Connecting Sonic Pi to KodeLife by Converting OSC Messages to MIDI
I’ve been trying to learn a bit of KodeLife and Sonic Pi to create images and sounds, and one thing I wanted to do that turned out to be trickier than expected is sending data messages from Sonic Pi to KodeLife so my shaders could react directly to data coming out of Sonic Pi.
In this post, I’ll describe how I set up a way to do this using the tools and tips I cobbled together from the web. In the end, we should have a circle that changes size with each OSC message from Sonic Pi.
Here’s a video of what it’ll look like (also embedded below), and here’s a link to the GitHub repo with both the KodeLife project and the Sonic Pi file.
So we don’t get totally lost, here’s the list of steps we’ll need to take to get this working:
- Send OSC messages from Sonic Pi
- Convert the OSC messages to MIDI
- Have KodeLife receive the MIDI messages
- Decode the MIDI messages in the shader
Whew… All right, here we go!
Running the OSC to MIDI Server
The main obstacle to overcome is that KodeLife doesn’t run an OSC server to receive messages from Sonic Pi. Based on the reply to this Tweet, the best course of action seems to be to 1) convert the OSC messages to MIDI and then 2) use KodeLife’s MIDI input parameters to receive messages from Sonic Pi.
To convert from OSC to MIDI, I used an open source tool called osmid, which appears to also be used behind the scenes in Sonic Pi. There may be binaries available, but I followed the instructions in the INSTALL.md to compile from source. Fortunately, it worked on the first go on Windows 10 with Visual Studio 2019 after installing CMake.
Once osmid is compiled, you’ll want to check that you can run the o2m server. If the server runs, then you’ve got everything you need to connect Sonic Pi and KodeLife.
Sending the OSC Messages from Sonic Pi
The next step is to send messages from Sonic Pi to osmid. The snippet below will play a note followed immediately by a “control change” OSC message on osmid’s default port (57200).
use_osc "localhost", 57200
beats = (range 1, 8)

live_loop :osc_test do
  beats.each do |beat|
    play (scale :e3, :minor).choose
    osc "/KodeLife/control_change", 1, 0, beat.to_i
    sleep 0.25
  end

  sleep 1.0
end
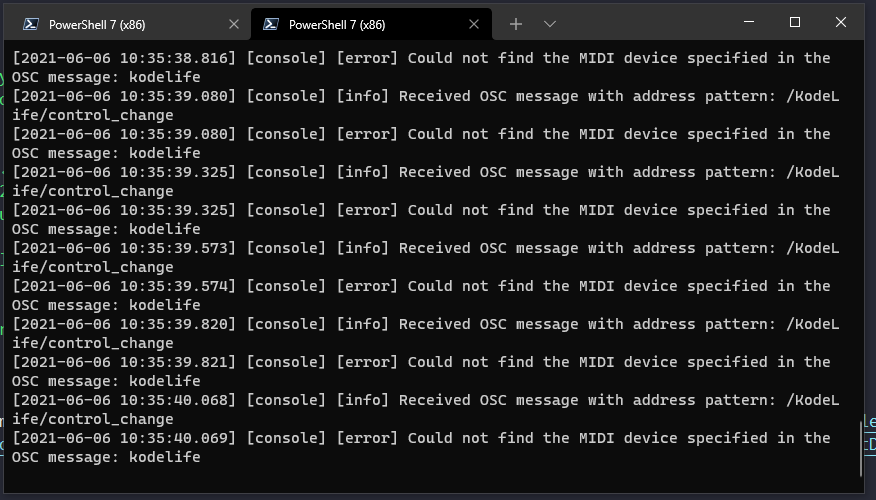
If you paste this code into Sonic Pi and run it with the o2m still running, you should hear the notes playing and see log messages appearing in your terminal window. The messages in your terminal window will likely be errors saying something to the effect of Could not find the MIDI device specified in the OSC message: kodelife. If you’re seeing this error, it is likely because you haven’t yet asked KodeLife to create a MIDI input.
Receiving the MIDI Input in KodeLife
Finally, we’re at the part where we can have our shader react to the OSC messages from Sonic Pi. As a reminder, the idea is to have the circle in the shader change size based on the data in the OSC messages. Before the shader code will work, however, we first need to configure KodeLife to be able to read the data in the message.
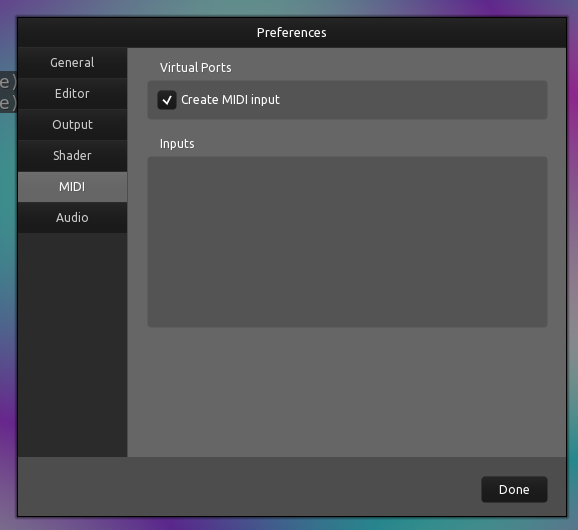
To have KodeLife create a MIDI input, open KodeLife, go to File, then Preferences, then MIDI, and check the box of “Create MIDI Input”.
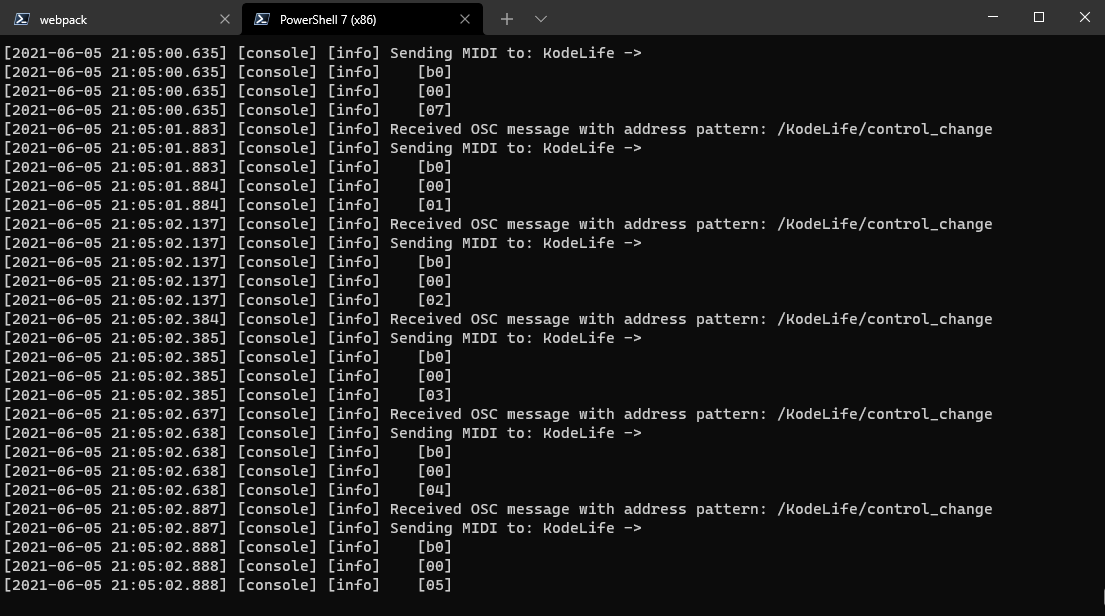
Once you check that box , you should start seeing the logs in osmid change to say something like Sending MIDI to: KodeLife.
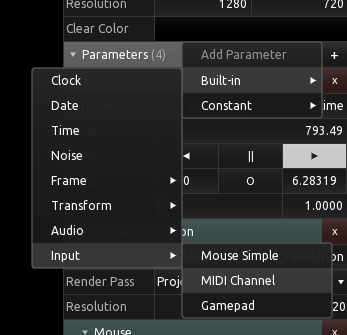
Now that the messages are getting through, we need to be able to read them into our KodeLife shader. To add the MIDI sampler to the shader, open the “Kontrol Panel” , click the “+” next to parameters, select “Built-in”, “Input”, “MIDI Channel”. If this is the first MIDI channel you’ve added, the name will probably be something like “midi1”.
Now we have the complicated task of extracting the MIDI data out of the texture. KodeLife’s website has an explanation of how to do it, but it didn’t quite work for me. This post on GitHub was very helpful, and got me over the hump (thank you!!). In the end, this ended up being my shader code:
#ifdef GL_ES
precision mediump float;
#endif

uniform vec2 u_resolution;
uniform vec2 u_mouse;
uniform float u_time;
uniform sampler2D midi1;

float circleSDF(vec2 st) {
    return length(st);
}

float fill(float x, float size) {
    return 1.- step(size, x);
}

vec2 midiCoord(float offset)
{
    float x = mod(offset, 32.);
    float y = offset / 32.;
    return vec2(x,y);
}

void main() {
    vec2 uv = gl_FragCoord.xy / u_resolution;
    vec2 st = (2. * gl_FragCoord.xy - u_resolution)/min(u_resolution.x,u_resolution.y);

    float ccNumber = 0.;
    vec2 coord = midiCoord(3. * 127. + ccNumber);
    vec4 midiValue = texture2D(midi1, vec2((1./32.) * coord));
    float beatSize = midiValue.w * 7.0;

    float circle = fill(circleSDF(st), .5 + beatSize);
    vec3 color = vec3(uv.x * circle, uv.y * circle, sin(uv.x+uv.y+u_time) * circle);

    gl_FragColor = vec4(color,1.0);
}
The above shader uses an example of Signed Distance Functions (SDFs) from Book of Shaders’ PixelSpirit deck, which is a really cool physical deck of cards that I’ve found to be a helpful tool in learning more about shaders.
Putting It All Together
Now, when we run Sonic Pi and KodeLife together, the circle will react to the OSC messages in concert with the notes in the :osc_test live_loop. I’m still getting my feet wet with shader programming and Sonic Pi, but it’s fun to imagine the things you can do with connecting not only the audio spectrum data but also other types of data between these two programs.
All that said, this was sort of a pain to set up! If you’ve found easier ways to get this all going, please let me know.